Tuesday 16 December 2014

Sale-A-Bration coming soon

WOW its coming the fantastic Sale-a-bration,  Whats that you may ask?
Each year Stampin' Up! have this fabulous offer on for every £45 you spend on products you get to pick a free product from the SAB catalogue and oh my there are some fab items in that book, I think its the best yet.

SO KEEP WATCHING for some projects made from the freebies.

They also on the same date launch the Spring/Summer mini catalogue and Boy they are fabulous again over the next few weeks I will be posting some items made from that catalogue.  today here are a couple of cards I made using one of the stamps from the Spring / summer catalogue. i am not able to post any details about the stamp used, so you will need to check back for detail.


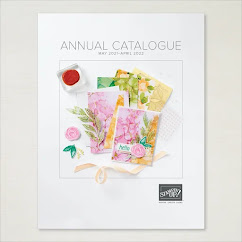
SALE-A-BRATION  & SPRING / SUMMER CATALOGUES 
Coming soon 
January 2015 - 31st March 2015

If you would like a SAB or Spring summer catalogue please contact me and I will post one out or you will be able to look at a digital version on January 6th.

watch out for more project using the new products.

Saturday 6 December 2014

Just thought I would share my team with you all

Morning, I thought I would share a picture of my immediate team that I work with, We are all Independent Stampin' up! demonstrators. We are in a bigger team with Natalie O'shea where she has 203 demo's under her. and we 5 are a little branch off from her.


We went to Basinstoke on Thursday for the launch of SALE-A-Bration which starts January 6th.. How it works is for every £45 you spend on Stampim' Up! products you get to pick a free item from the Sale-a-bration catalogue and there are some great products in there, I will post some projects soon, but you will have to wait till Jan 6th to see the catalogue.

So who is who ....Charry who is 2nd from the left is immediately under Natalie and my upline, Rachael (1st left) and myself are under Charry and then Grace next to me and Fiona come under my umbrella (my down lines). They are both super ladies and I love having them in my team.

Charry is a superb upline and we are a great but small ( at this time) team.

There will be some fantastic deals on joining coming up in Jan with lots of free goodies and a kit with extras. its just £99 to join and that gives you a £130 kit with product of your choice plus some more freebies. So contact me if you would like to join and be a member of our team.


Tuesday 2 December 2014

Everything ELeanor

This set along with Kinda Eclectic is one of my go to's. You can make some fabulous cards and backgrounds with this set.  I saw a card similar to this on pinterest and this is my version.


Using A6 whisper white card base.

1. Stamp the foliage background stamp From the Everything Eleanor in Olive Green onto a Matt of Whisper white cards took.

2. Using an embossing folder (sorry the script one I used is now retired) stagger the plates on ypur bigshot or machine of choice to enable a strip of the embossing only to go across the centre of the whisper white stamped Matt.

3. Stamp a greeting in the place of your choice, I like top or bottom right.

4. Wrap old olive bakers twine twice Around the card and fasten at the back.

5. Matt the whisper white stamped card onto Melon mambo card stock and add to the front of the card base.

5. Using the large flower from Everything Eleanor stamp 3 images in melon mambo ink  and 1 in old olive.

6. Cut out all 4 of the images. Leaving the 1st pink one full the 2nd removing 1 leaf, 3rd removing 3 leaves.

7. Cut the old olive image in to half to use a leaves, decoupage the flower and add to the stamped and embossed Matt. ( this one does not show the green leaves - but it looks great with them on)

8. Finally add either Rhinestones or candy dots in melon mambo to the foliage.

I hope you like this card as much as I do you can make lots of different versions and colour ways for this card using this lovely set.

Thursday 27 November 2014

Love this set - Kinda Eclectic


Using Whisper white card stock A6 in size.

1. I lightly skimmed across the inside of Modern Mosaic embossing folder with Crumb cake ink and laid the front side of the card inside and randomly pressed to give the background image a distressed look.

2. Stamp the Sun blast in Hello Honey

3. Stamp the leaves in Old Olive from the Kinda Eclectic set using 1st 2nd and 3rd generation stamping.

4. Using Pumpkin pie stamp randomly the small butterfly

5. using a strip of DSP in Blackberry bliss cutting either at an angle or a banner style to your preference

6. Add some linen thread

7. stamp a sentiment onto Kraft card and decorate either....
      a) Stamp & Punch out large butterfly and add to sentiment
      b) stamp the butterfly image onto Whisper White and punch the butterfly out of the Kraft card  with the sentiment on and then lay over the butterfly,

8.  Raise with 3-D dimensionals.

9. Punch out and add to card and finish with some rhinestones to complete the look.


Would you like to make these cards why not Come along to a class to make 6 cards 2 of seach design and a lovely box to give as a gift.

I will be posting new class dates this week they are held in Wivelsfield Green, West Sussex.

Thursday 13 November 2014

A 3-D project

Oh my gosh the last two weeks have just been a whirl. I just lost days and cant find them, I feel like I have not stopped but cant show anything constructive for any of them.. Loads of workshops and prepping thats all i can say.

So I thought I would show you a little 3-d project I put these on the table for each person this week at the classes.


Very simple using a piece of card cut to 10.5 cm x 11.5cm and scored as per the photo bend in the two flaps and secure with glue or tape my preference is the red line tape.

Cut a srip of paper long enough to wrap around your box and either stamp a design or just use a contrasting colour or DSP, then stamp a sentiment of choice.... then of course a little bar of Green & Black chocolate. Hey Presto!

One of my Lovely friends from my stamp group Kim Fee made a larger version and it gave me the idea to make a smaller one to fit my chocolates..
you can use all number of stamped sentiments to create your own version of this.


Sunday 26 October 2014

For the Men....


Sorry I did not post on Tues, got back from convention and my feet didn't touch the ground for 5 days. So apologies that this is late. I'm still sorting through my convention swaps and will post some here this week. Brussels was amazing and I had such fun with new and old friends.

Men's cards are so hard to make, I made this for my next door neighbour who loves travelling.

Using sponge dauber I picked up the ink from the pads and blended to give the sea/land contrast. distressed the edges of the card again with the dauber using the Early Espresso only. I Stamped the globe image onto Very vanilla card stock and once again distressed the edges before layering onto black card.


Tuesday 14 October 2014

This weeks cards are made using the Hostess Set - BLOOM WITH HOPE

Good Morning.

On Thursday I'm off to Brussels for the Stampin' Up! Convention. It's my first one so I am super excited. Next week I will post some pictures of the swaps I get along with the swap that I have made tto take with me… we make about 50-100 swaps take them to convention and come home with the same amount of projects others have made,  its a great way of learning new techniques and getting some great ideas.

Ok to this weeks project. I made 4 small 4"' sq. cards using 'Bloom with hope' which is one of the hostess sets., each flower head I stamped 3 times and coloured with Blendabilities  ( we like to call them blendibobs)  and then decoupaged each one to give a great 3D effect...


You can get this beautiful set ( 11 stamps ) for just £15.00 by using hostess pounds when hosting a party with a  minimum sales of £150.

What I used